Table of Contents
Chat Capture Window Mudlet Script
Let's walk through setting up Mudlet to separate channel output for [chat] in its own window so it won't be lost with combat spam.
Create a Window Script
- Connect to the MUD with your existing Mudlet profile
- Click the “scripts” button in the toolbar
- Click the “add item” button to create a new script.
- Enter a name, like “Chat Capture Window”
- In “Add User Event Handler:” enter:
sysConnectionEvnet
- Click the “+” button.
- Copy in the following source code to the text area.
function make_chat_window() chat_window = Geyser.UserWindow:new({ name = "chat_window", titleText = "CHATS", docked = true, height = "5c", dockPosition = "top", autoWrap = true, }) chat_window:setFontSize(getFontSize()) return 1 end make_chat_window() - Your scripts setting pages should now look exactly like this:
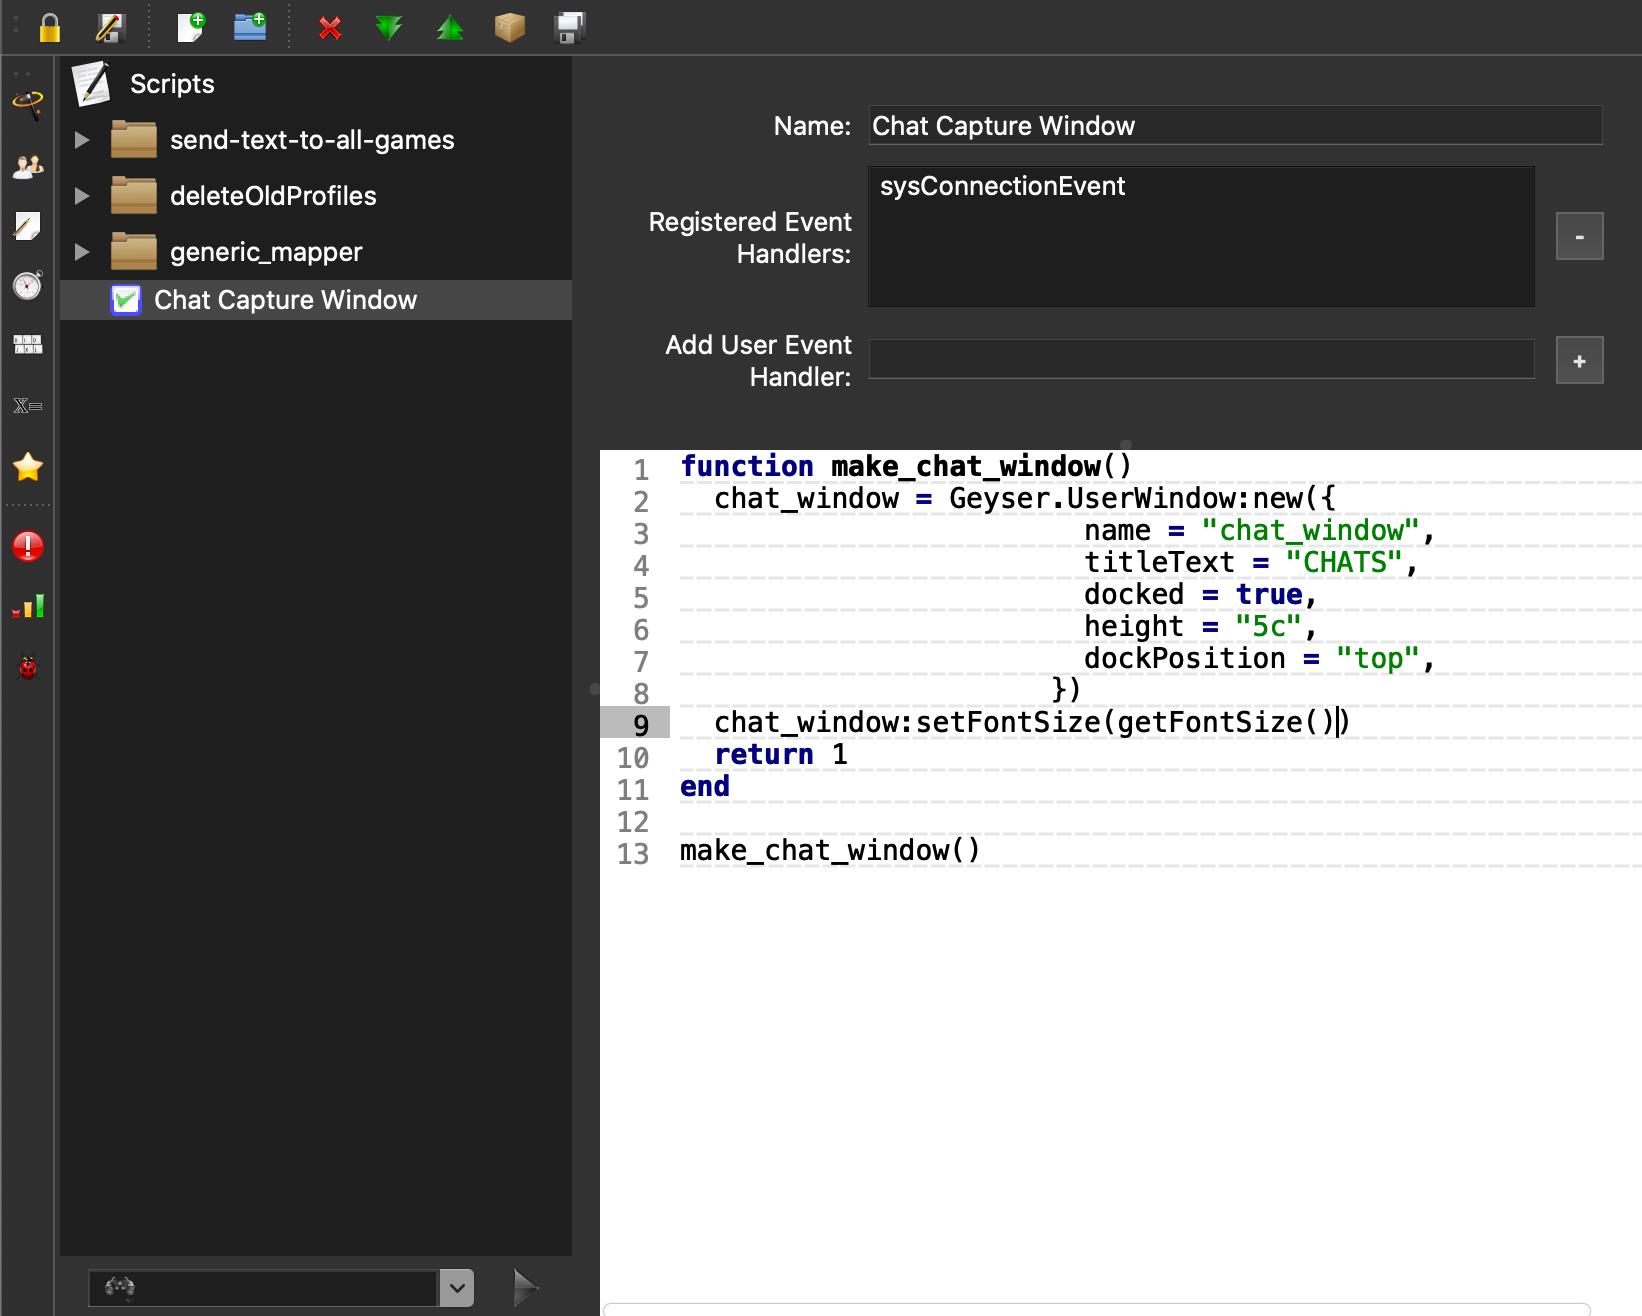
- Click the “Save Item” button

Create a [chat] Capture Trigger
- Click the “triggers” button in the toolbar (or the lefthand menu of the scripts page if you still have that open).
- Click the “add item” button.
- Give your trigger a name like “Chat Capture”.
- In the first pattern, enter a channel name as it appears in game:
[chat]
- Leave everything else empty.
- Copy in the following code to the textarea:
if(chat_window) then selectCurrentLine() copy() chat_window:appendBuffer() end - Your triggers settings page should now look exactly like this:
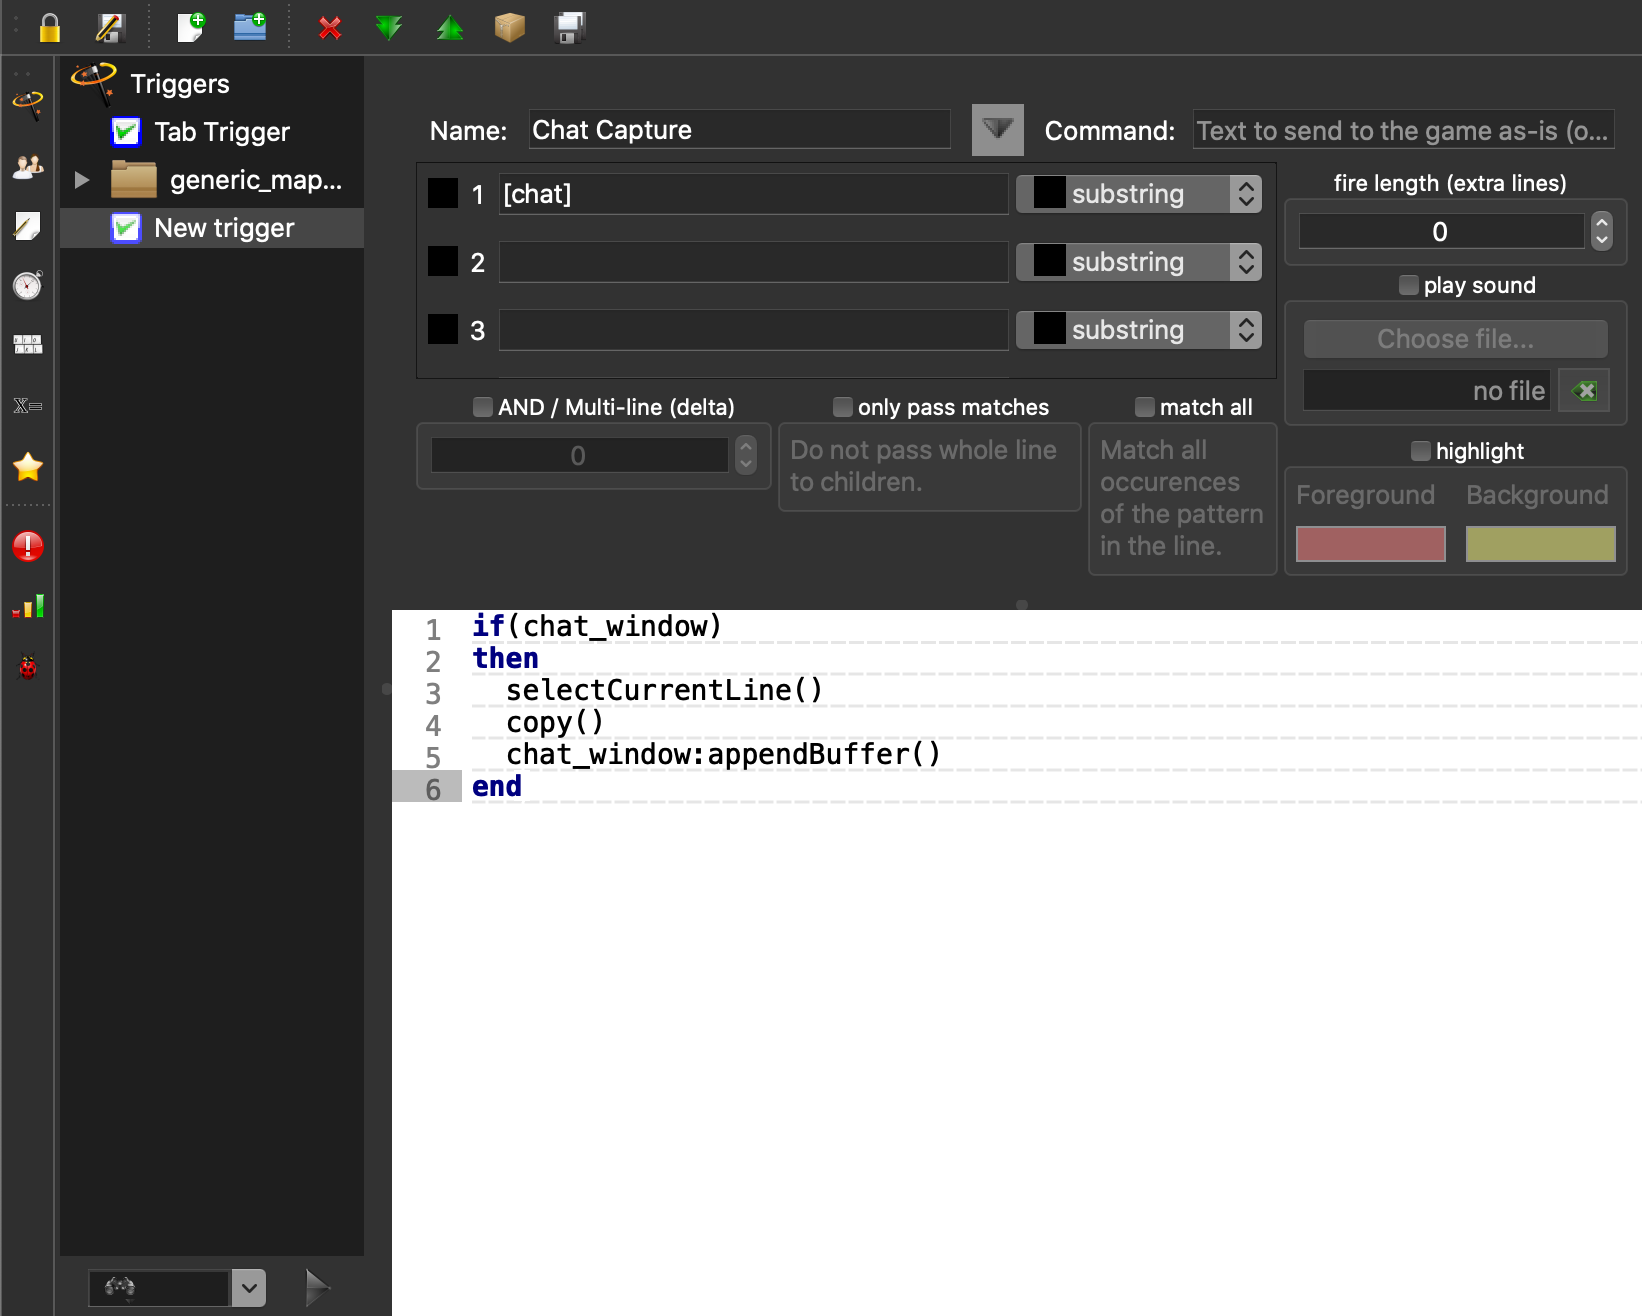
- Click save item.
- You may need to reconnect to the MUD to get the window to appear.

Advanced: Adding Timestamps
To add timestamps to your chat capture window, replace
copy()
chat_window:appendBuffer()
in the previous examples with
echo("chat_window", string.format("%s: %s\n", getTime(true), getSelection()))
Check the Mudlet Lua documentation to see more formatting options for getTime().
Capture Additional Channels
To capture additional channels to the same window simply add more capture patterns to the trigger.
Styling the Capture Window
Here's an example of adding additional styling to the chat capture window.
NOTE: Requires Mudlet 4.10+ and Linux - will not work on older Mudlet or MacOS/Windows
- Open the “scripts” page again by clicking the button in the toolbar.
- Change your “Chat Capture Window” script (or whatever you named it!) to add a
chat_window:setStyleSheetfragment:chat_window = Geyser.UserWindow:new({ name = "chat_window", titleText = "CHATS", docked = true, height = "5c", dockPosition = "top", }) chat_window:setStyleSheet([[ background-color: black; border-width: 2px; border-color: #005c28; border-style: groove; border-radius: 2; ]]) chat_window:setFontSize(getFontSize()) return 1 end make_chat_window()